Overview
Set up advanced workflow actions that allow a form to be completed by multiple users in different stages. Only relevant sections will be shown to each user, and the form will be automatically forwarded to the next user until the final stage is complete.
For example, let's say you have a form with three sections: one for the office, one for an inspector, and one for a supervisor. You could set up rules that allow each team member to complete their assigned section, with the other sections hidden.
When the office worker completes their section, it would automatically be forwarded to the inspector. When the inspector finishes, it would be automatically sent to the supervisor. When the supervisor fills out the final stage, the form would be complete when submitted.
Setting Up the Form
Using the example stated above, we have created a form with three separate sections that will display during each of the three stages. Each stage is labeled accordingly.
Office Stage (Section 1)
-
- Customer Name (Text Field)
- Customer Phone Number(Formatted Numeric Field)
- Customer Address (Long Text Field)
Inspector Stage (Section 2)
-
- Windows (Option List)
- Multi Photo Field
- Doors (Option List)
- Multi Photo Field
- Ceiling(Option List)
- Multi Photo Field
- Walls(Option List)
- Multi Photo Field
Supervisor Stage (Section 3)
-
- Approving Supervisor Name (Text Field)
- Status of Project (Option List)
- Supervisor Signature (Signature Field)
Establishing Workflow and Delivery Actions
Once the form is set up, select the Delivery button to set up the three stages.
In our example, we have set up and labeled the three stages of the form. The first portion is the Office Stage, where customer information will be collected and sent out to the inspector. Next, the inspector will complete the Inspector Stage, and lastly the form will be sent to the supervisor for the final approval.
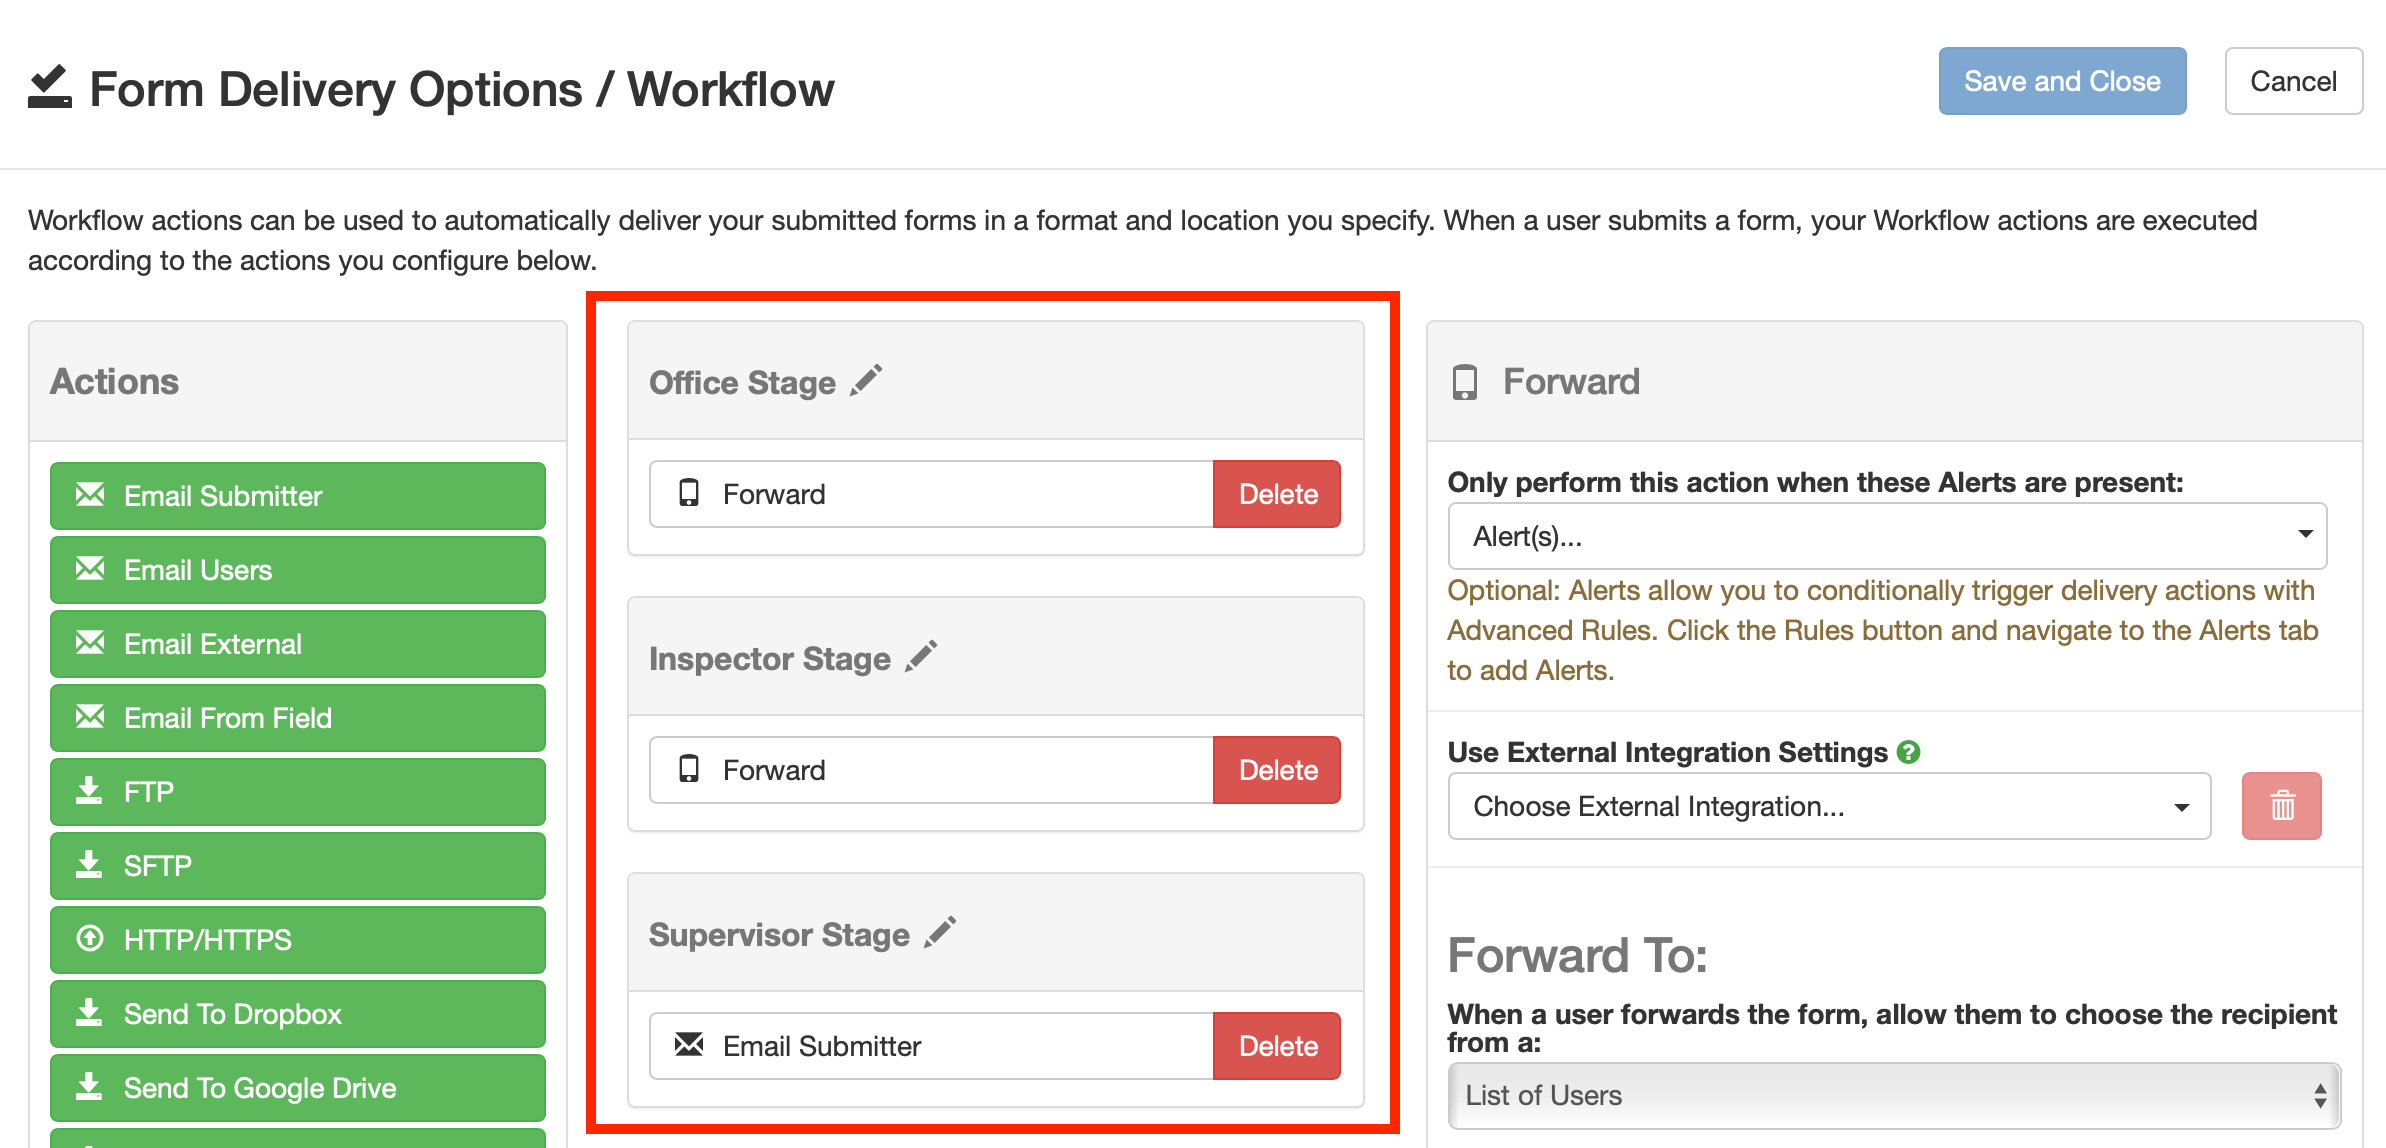
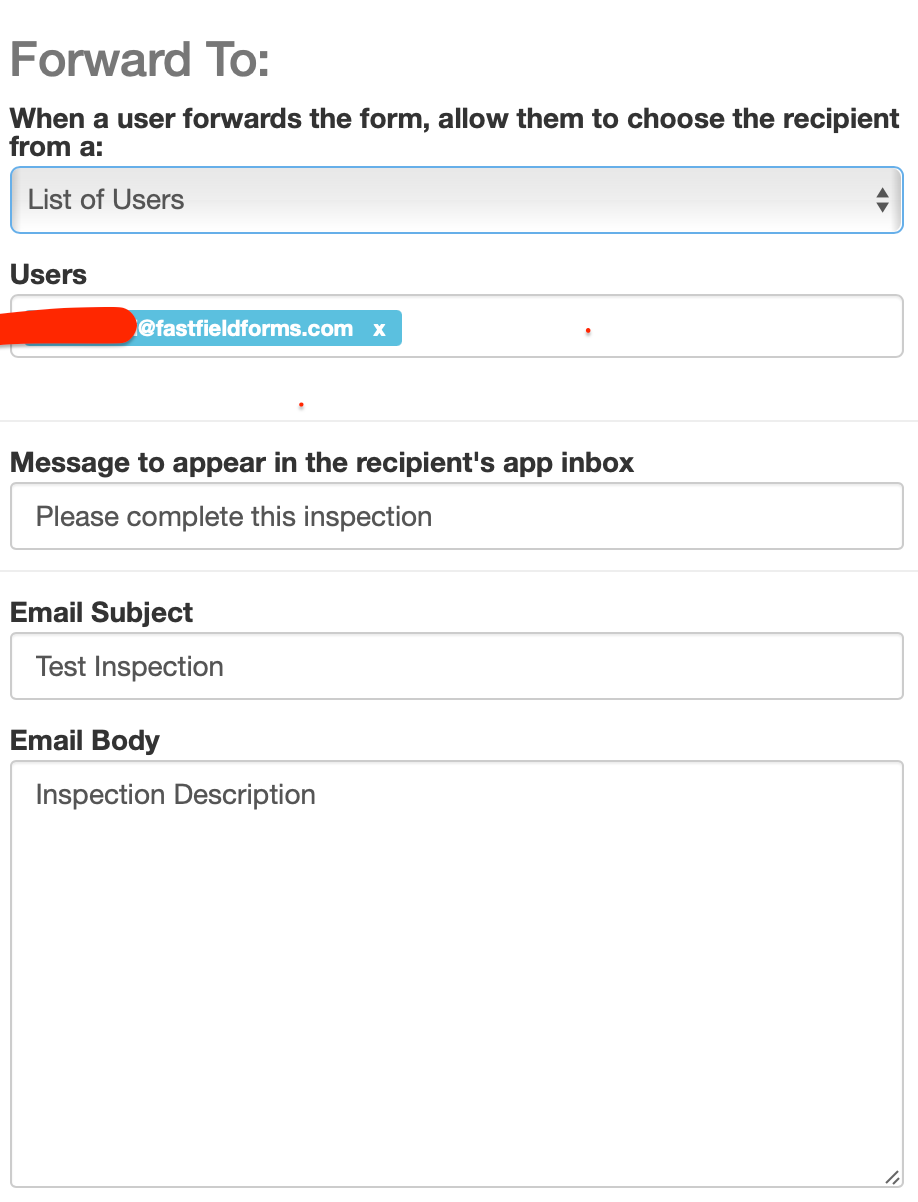
At each forward stage you will need to choose the recipient and fill out the message boxes with the information you would like to be provided in the recipient's app inbox and email inbox.
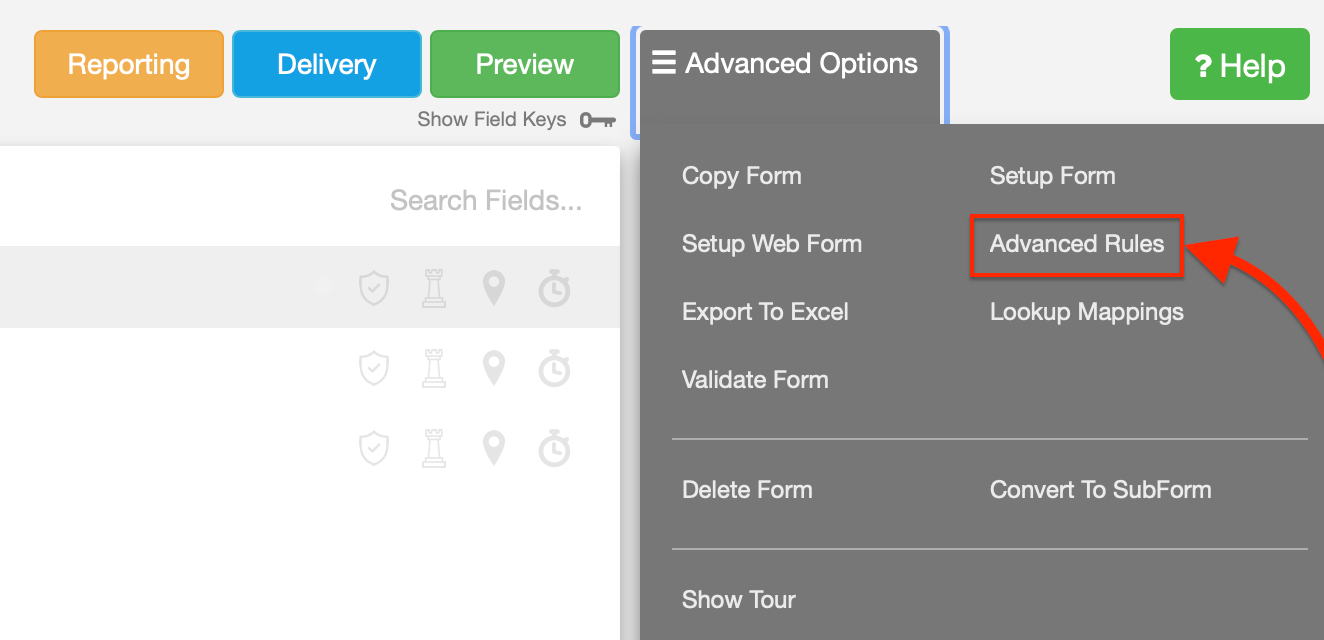
Creating the Advanced Rules
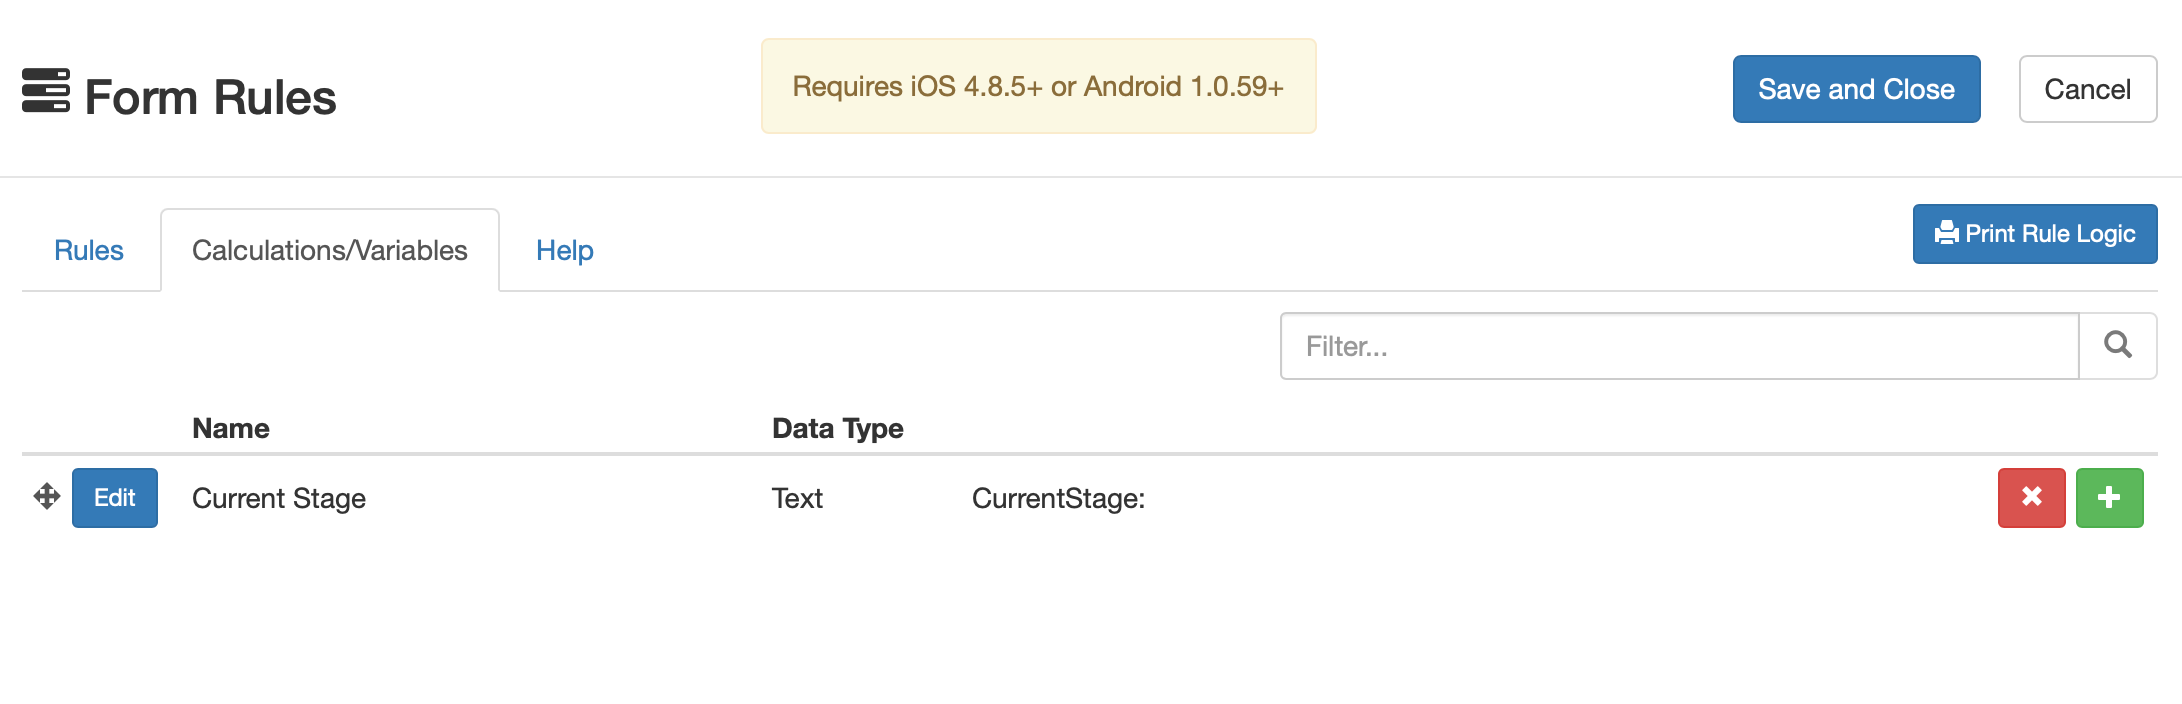
1. Go to the Advanced Rules section of your form:
2. Add a Variable.
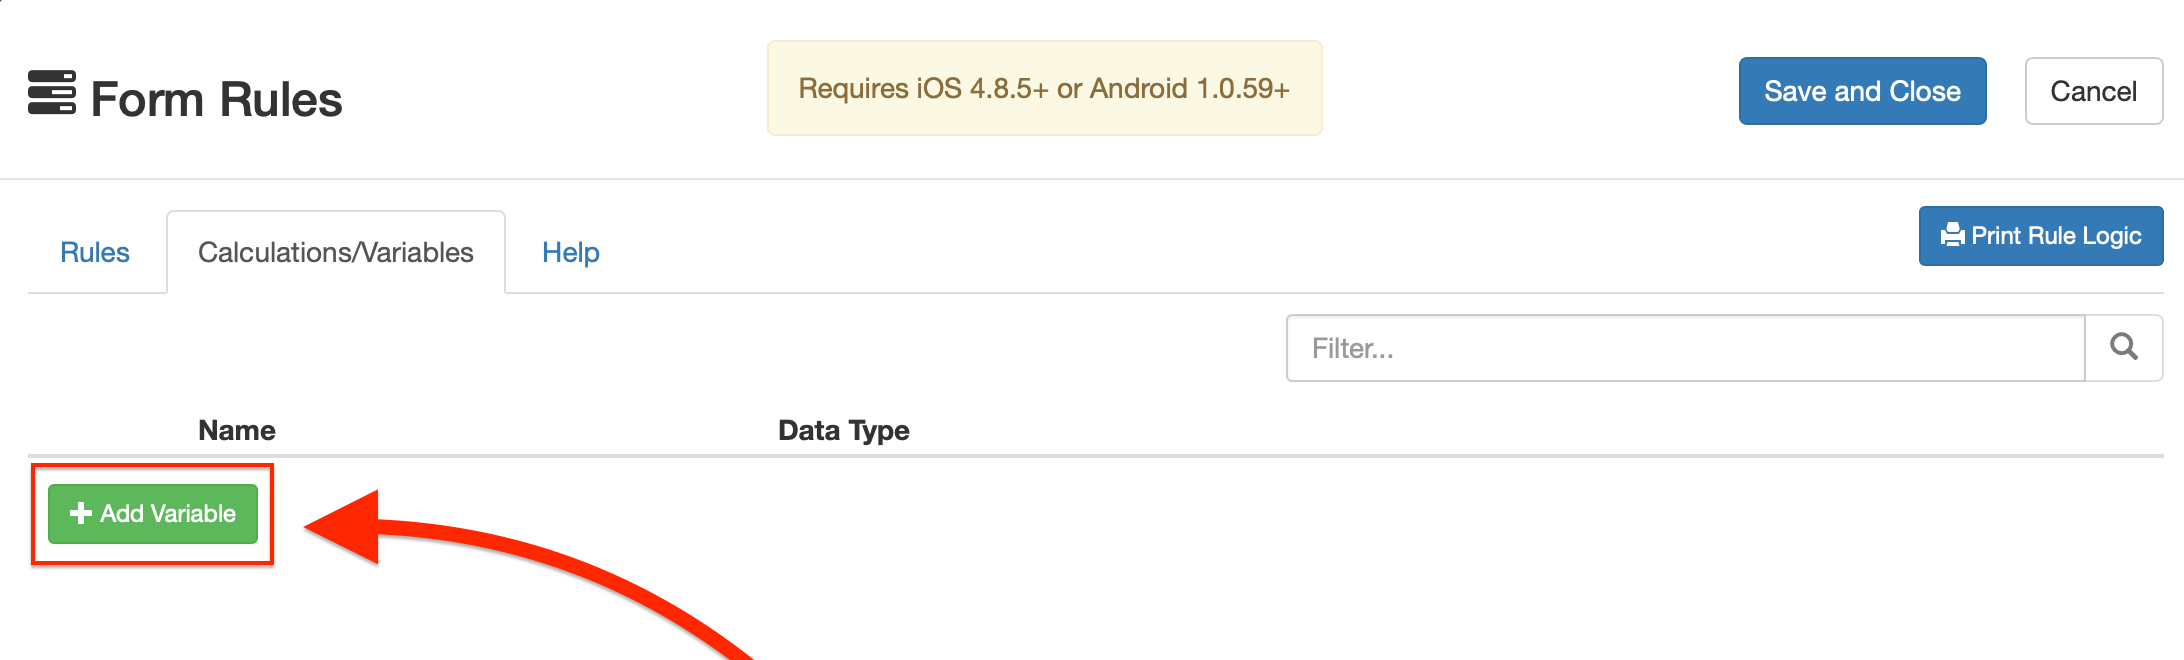
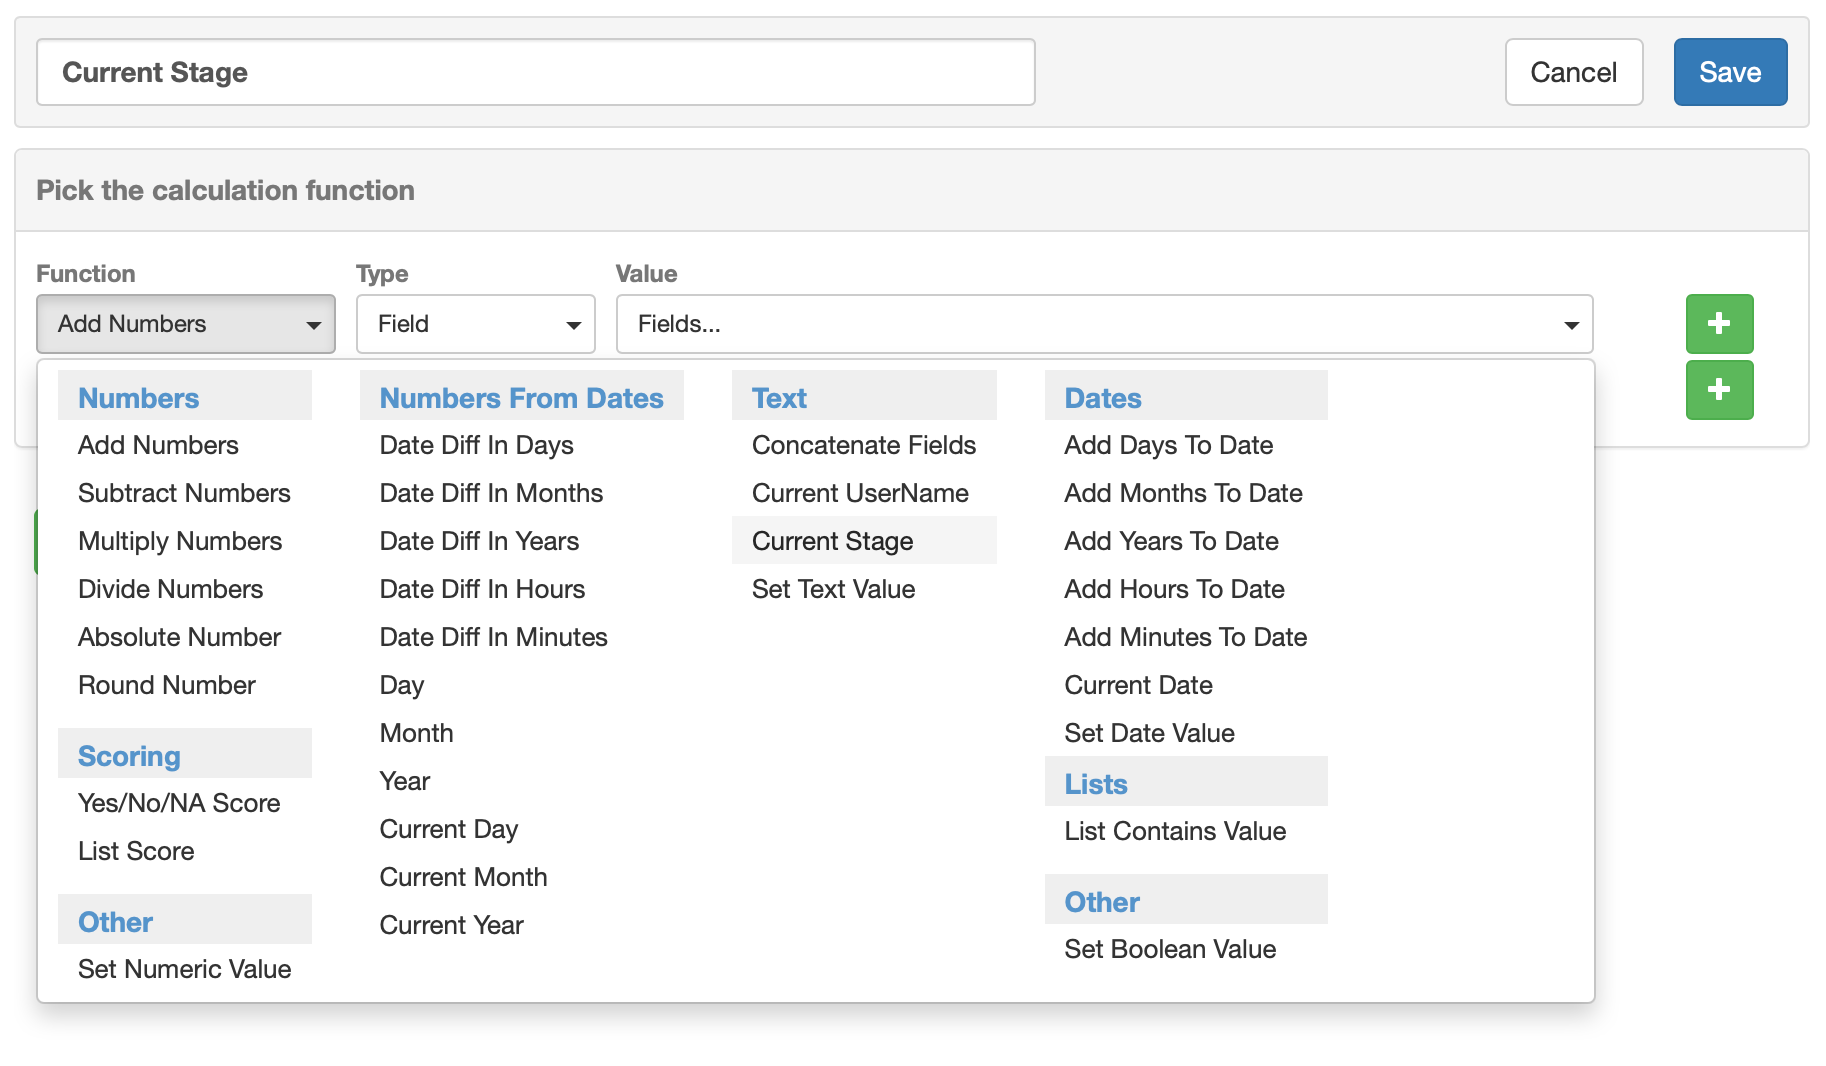
3. Rename the variable and click on the Function drop-down menu.
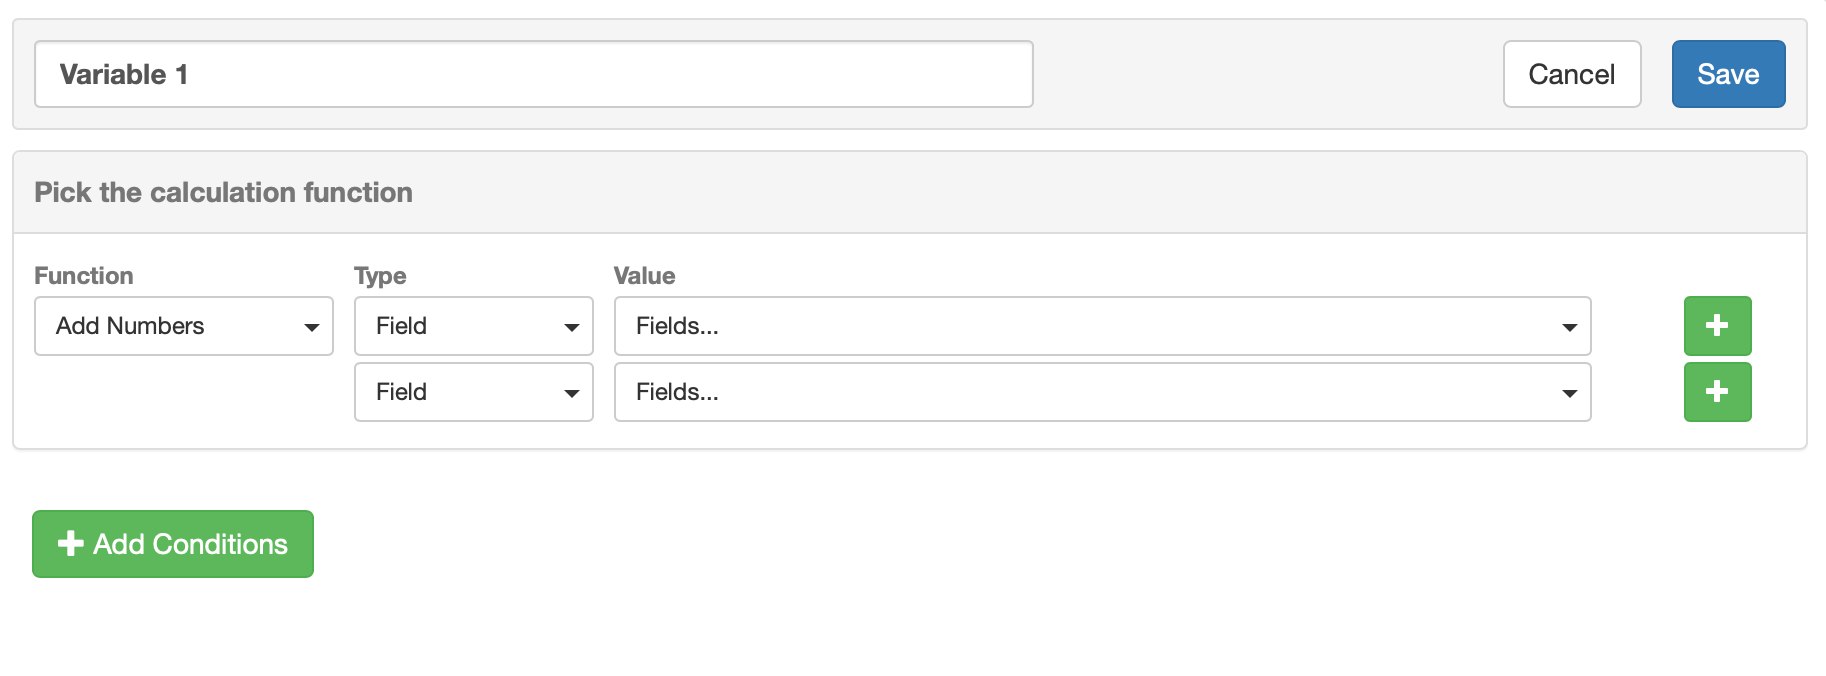
In our example, we have named the variable Current Stage and have selected the Current Stage text variable option.
- Once the variable has been determined, then continue to the Rules tab to set up the conditional logic to hide and show sections.
- Below we have created the Stage Rules. When setting up each rule, select your variable as "Current Stage""Equals" and then the name of the previously defined stage in the workflow delivery;
- Note: This name must be an exact match with no extra spaces or characters in order to work correctly.
