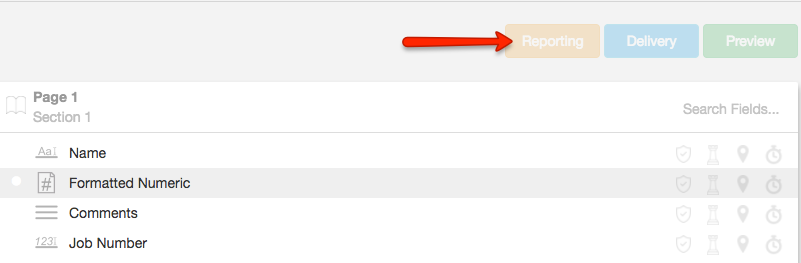
Overview
When creating a Custom Word Report, you have the capability to include dynamic checkboxes that correspond with items checked off from a user's submitted form. For example, if a user checks off items from a list on a form from the App, your report can also show that same list with checkboxes marked accordingly.
Prerequisites
Before you can add dynamic checkboxes to your custom Word report, you'll need to:
- Have an updated version of Word. Many of these techniques are not going to work if your Word program is out of date. We recommend that you have a Word version of 2017 or greater.
- Enable Developer Settings in Word. These settings are usually not enabled by default, and the steps, which are included in this article, vary slightly for Mac and Windows.
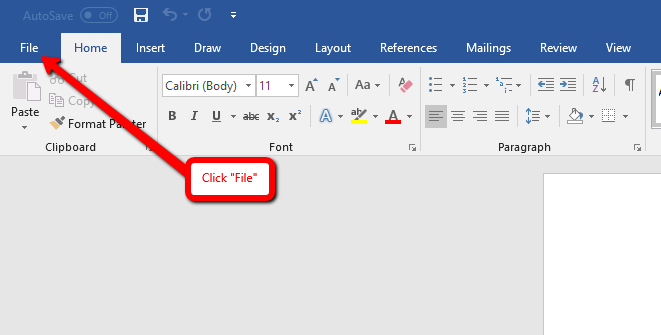
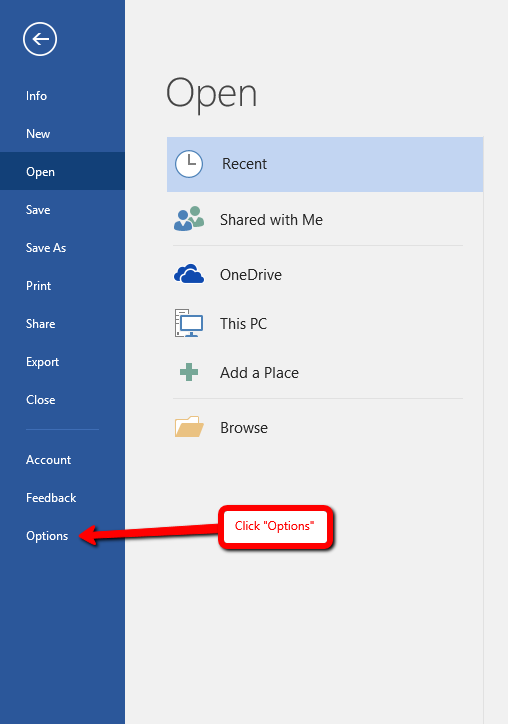
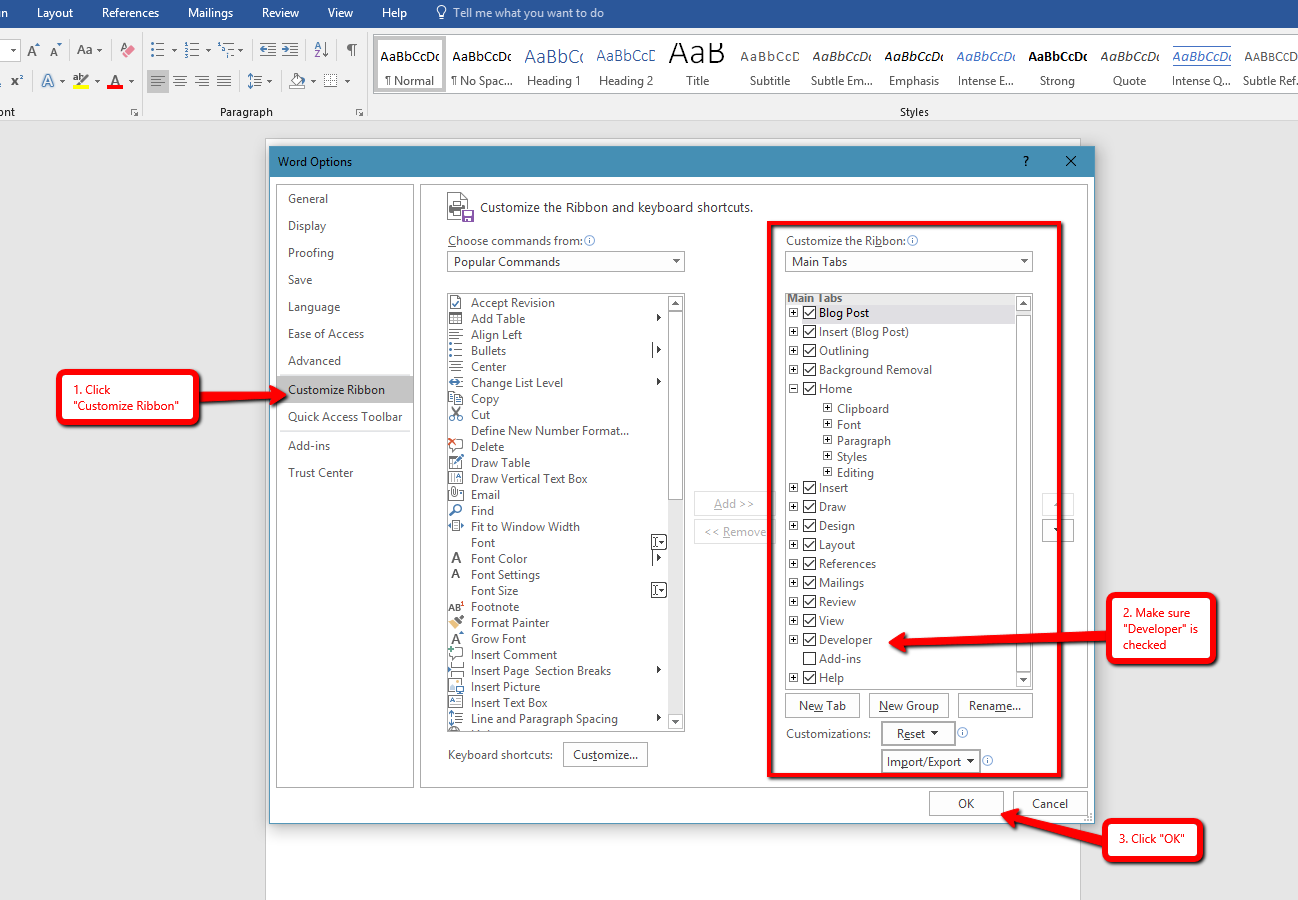
Enabling Developer Settings: Windows
Follow the steps below to enable Developer Settings in Microsoft Word on Windows.
1.
2.
3.
4.
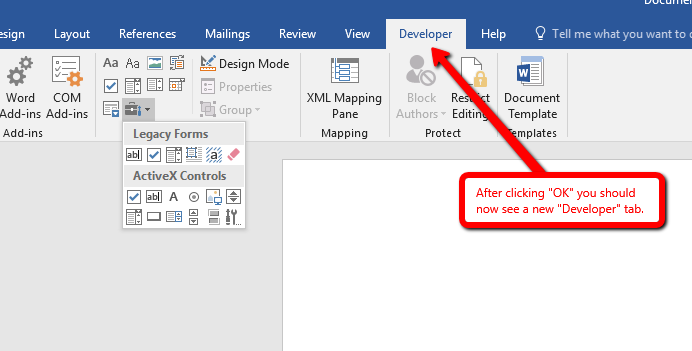
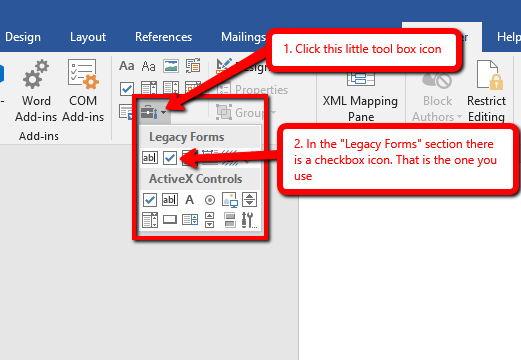
In the Windows version of Word, you have 3 different checkbox types to choose from. Only 1 of the types works with our software, so it is important that you choose the right one.
In Windows they call the checkbox type that we use Legacy Forms Checkbox. See the screenshot below for the correct one:
Enabling Developer Settings: Mac
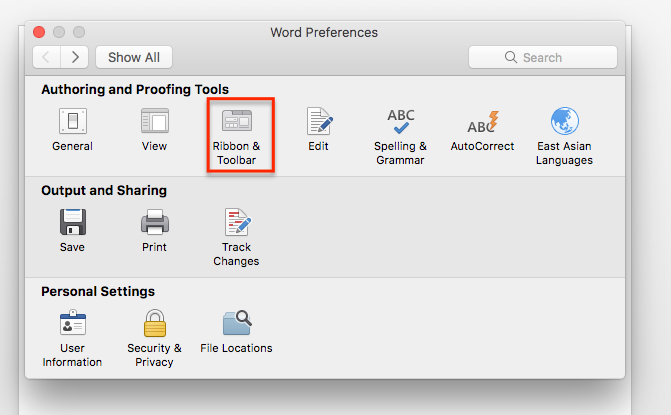
1. Open Word and select Preferences > Ribbon & Toolbar
*Note: There may be slight variations in menu names depending on your version of Word and whether you are using a Mac or PC.
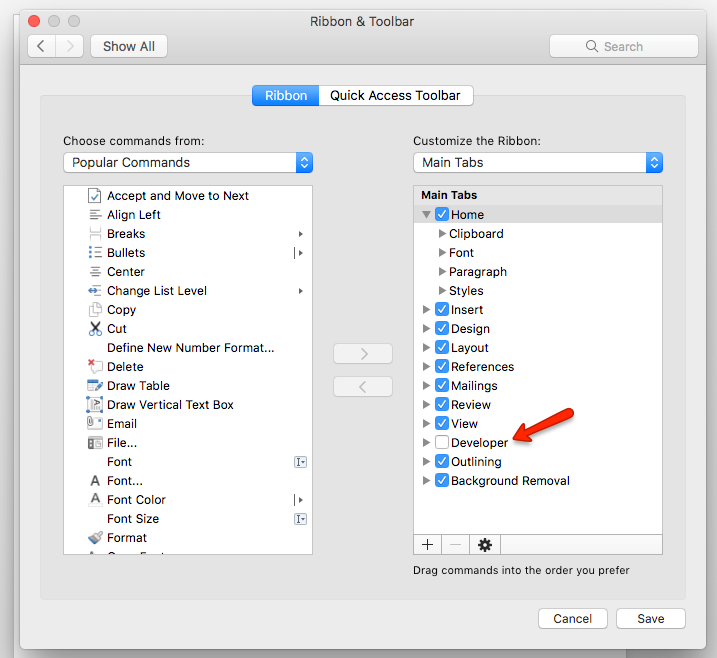
2. On the right panel there is a menu item called Developer that is unchecked by default. Make sure Developer is checked and click Save.
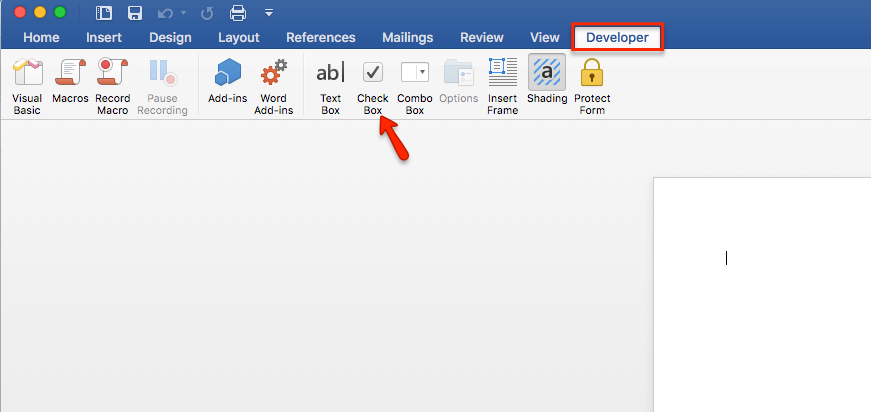
3. Once saved you will notice on your menu a new Developer tab. Select it and you will notice that there is a Check Box button. This is what you will use to add dynamic checkboxes to your custom Word templates.
How to Add Dynamic Checkboxes to Your Custom Word Template
Before adding dynamic checkboxes to your Word report, there are a few limitations & prerequisites to be aware of:
- It is currently NOT possible to add checkboxes to fields inside Subforms or Repeating Sections. We currently only support checkboxes that are in the main form.
- You must have Developer Settings turned on. If you haven't already done so, please follow the steps above.
- You need to make sure your Field Keys and Values have less than 20 characters since Microsoft Word only supports 20 characters for defining your bookmark.
To add Dynamic Checkboxes to your Custom Word report:
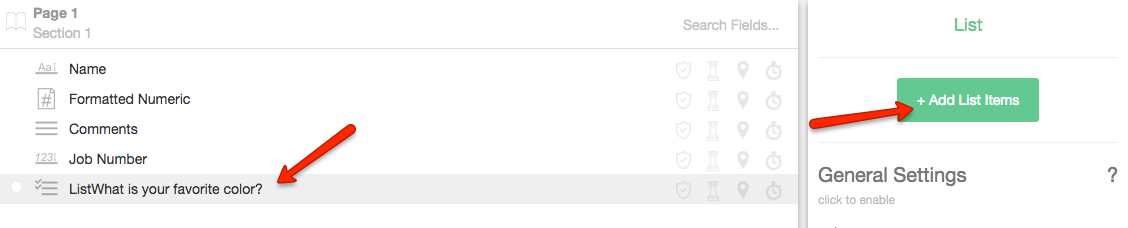
1. Set up your List field in the Form Builder.
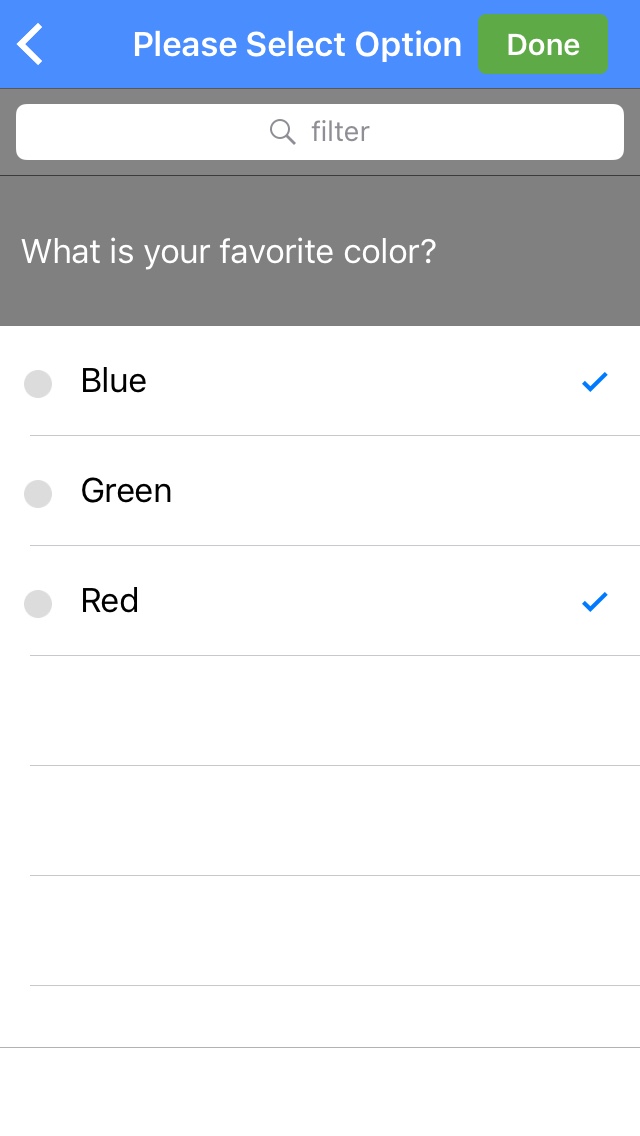
- In the example below, we have a simple list that asks What is your favorite color?
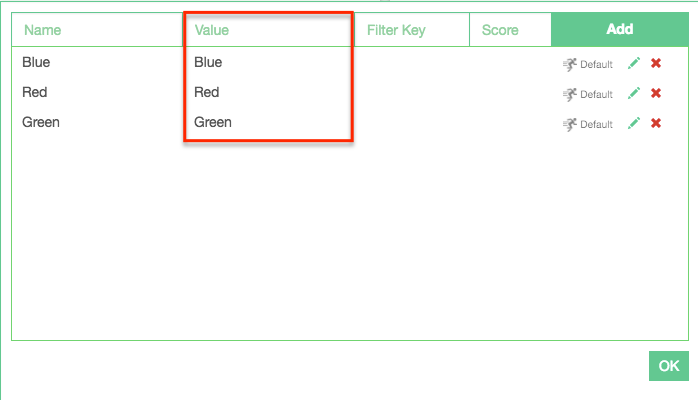
- This list has a Field Key of favoriteColor with 3 list values: Blue, Red and Green.
- We have also enabled Allow Multi-Selection so that it will map to multiple list values at once.
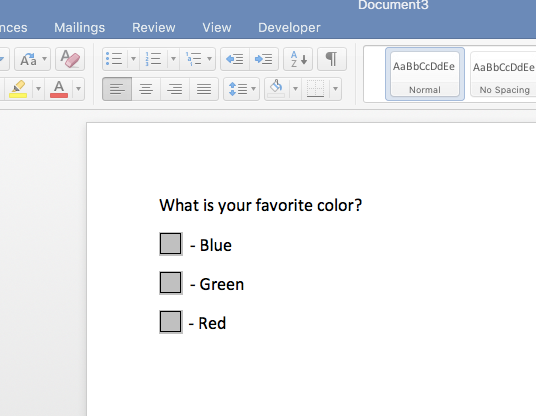
2. Add Checkboxes to your Word template (one for each list value).
- In our example below, we have added 3 Checkboxes since we have 3 values: Blue, Green and Red.
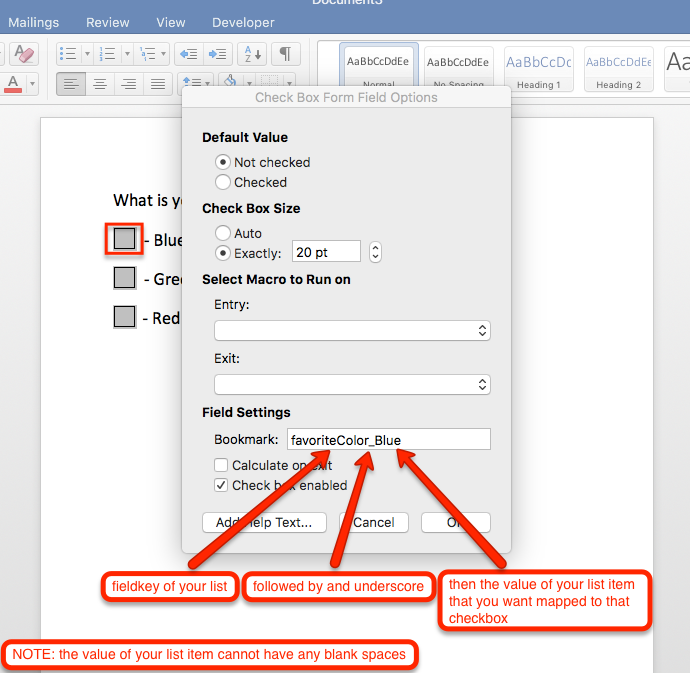
3. Double-click your Check Box or right-click and select Properties. In the Bookmark field, put the Field Key of your list followed by an underscore(_) and the value of your list item.
*Note: Your list values must NOT have any spaces or else they will not work with your custom Word template.
- In our example, we typed favorite Color_Blue in the Bookmark field since our Field Key is favoriteColor and the value of the selected checkbox is Blue.
4. Repeat step #3 for each of your checkboxes

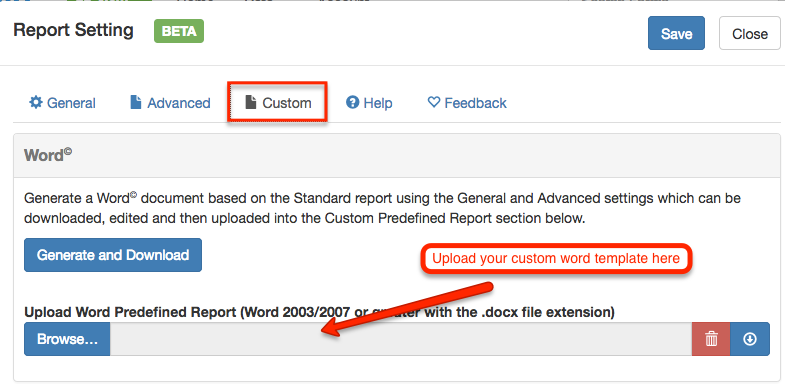
5. After you are done mapping each of your checkboxes to your list values, save your Word document. Then, upload it to the Custom Report Settings Tab of the builder.
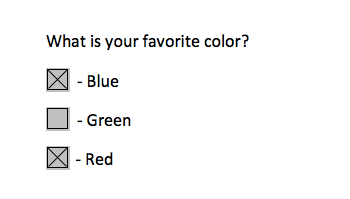
6. Save and publish your form. Then, open the App, log in and submit your updated form. You will see that on your report the list items that you selected will be checked in your custom word report.
And here is what it will look like on the word report
Congratulations! You have now successfully set up dynamic checkboxes in your custom Word report.